Since the launch of MindManager Windows 21 / MindManager Mac 13.2 in October 2020, MindManager Enterprise customers now have their own License Administration Portal.
To see how to activate our License Administration Portal, visit this page.
If you have issues to activate your License Administration Portal or to log in, visit this page.
Introduction
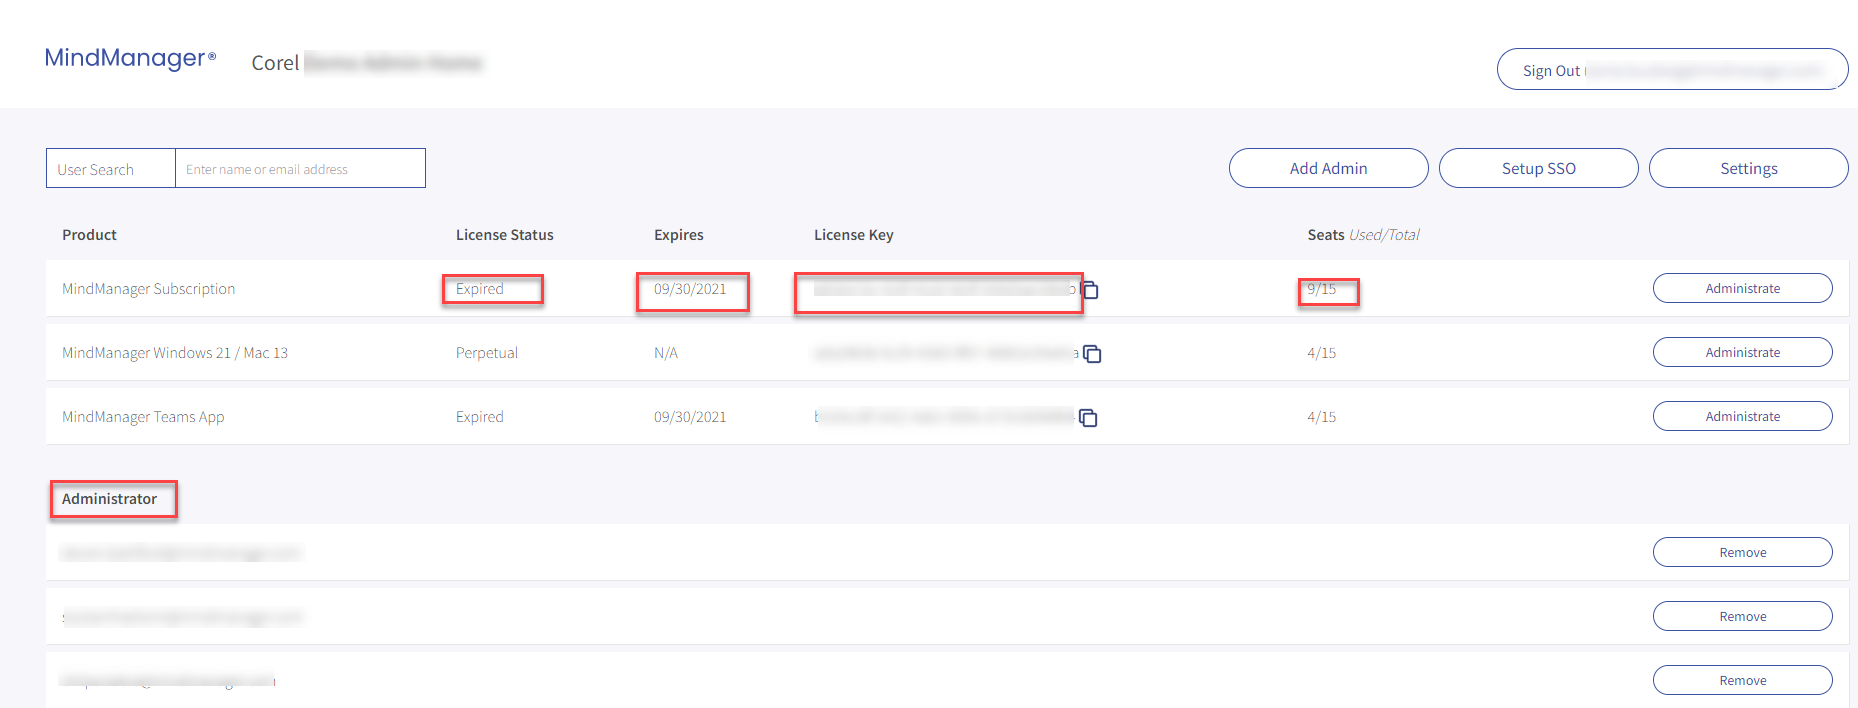
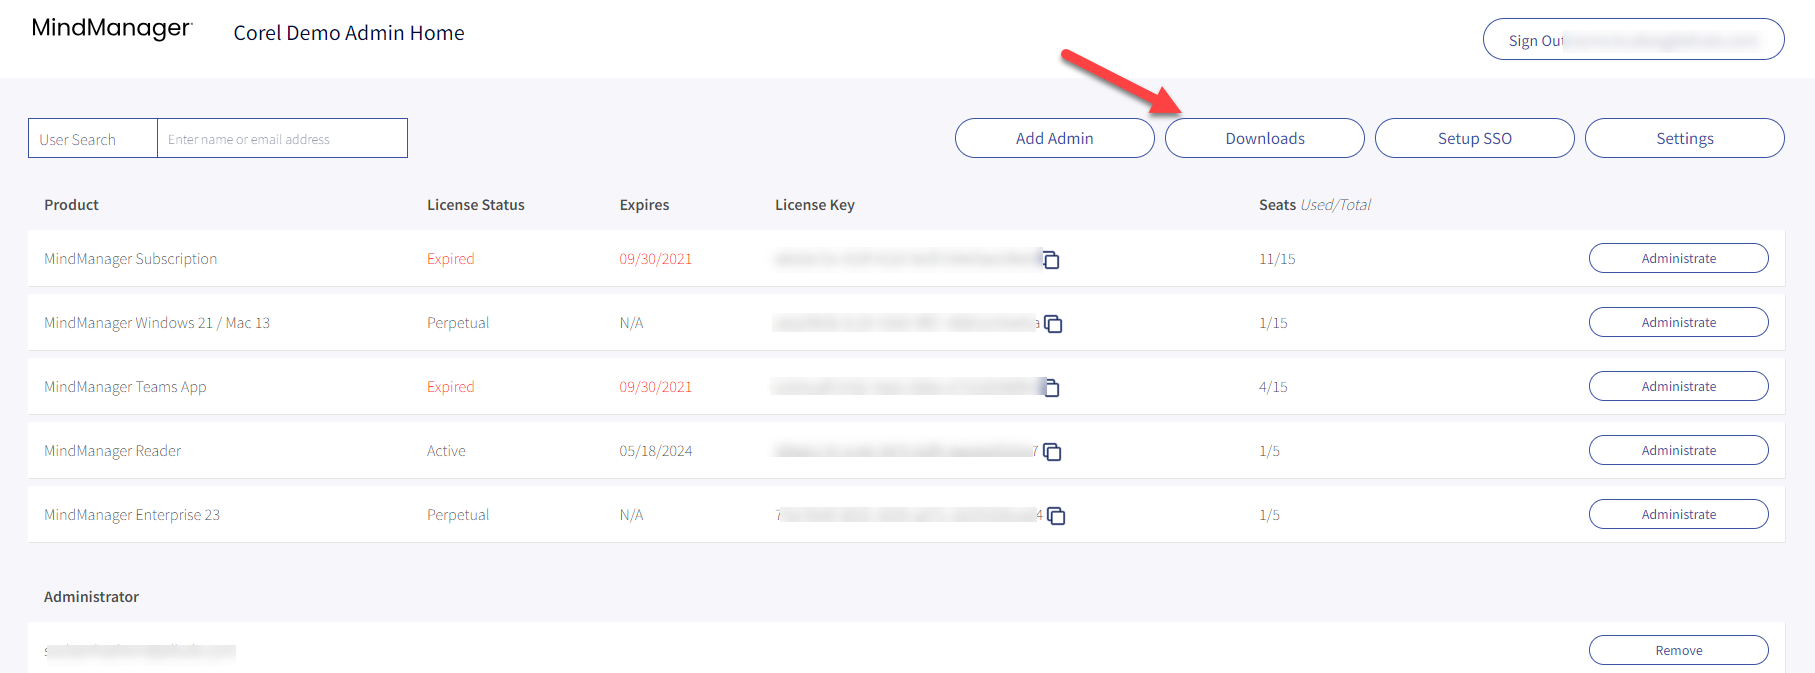
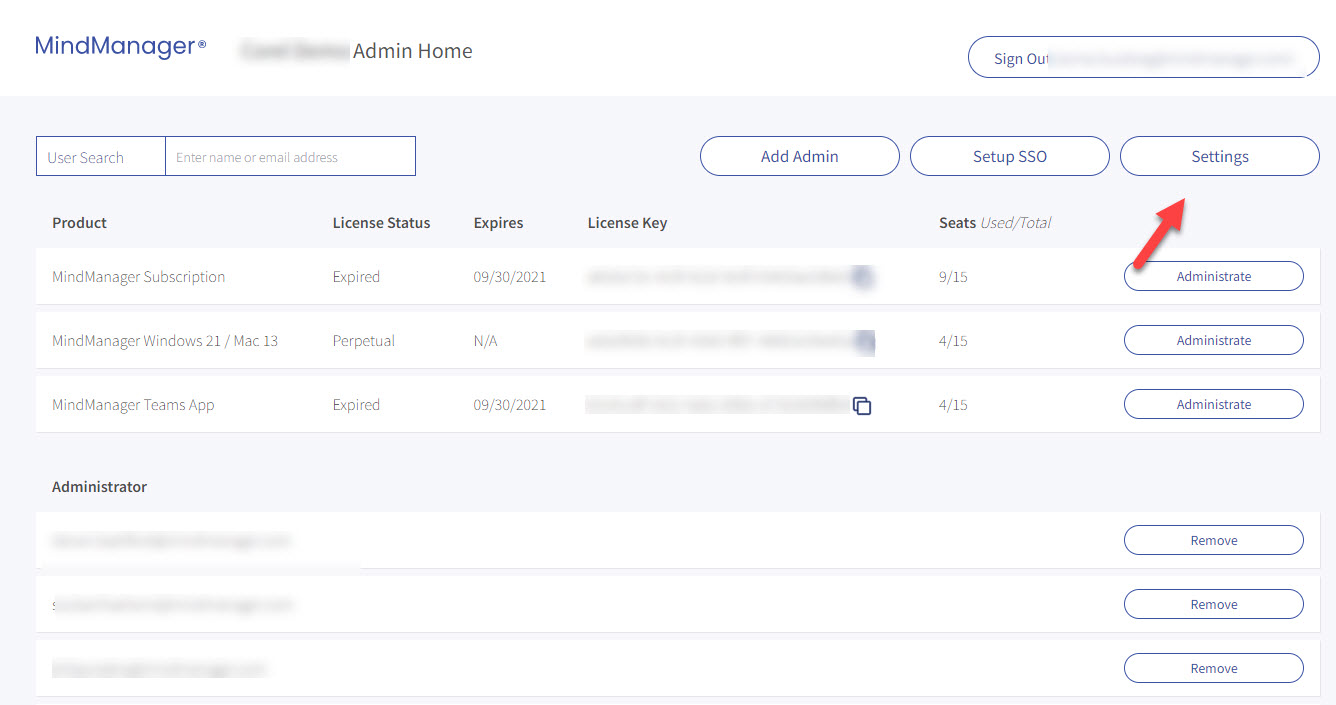
Once the administrator is logged in into the License Administration Portal, he can view the status of your license(s), the expiration date, your license key(s), the total number of licenses you own, and the number of licenses in use.
He can also see all administrators registered in your License Administration Portal.
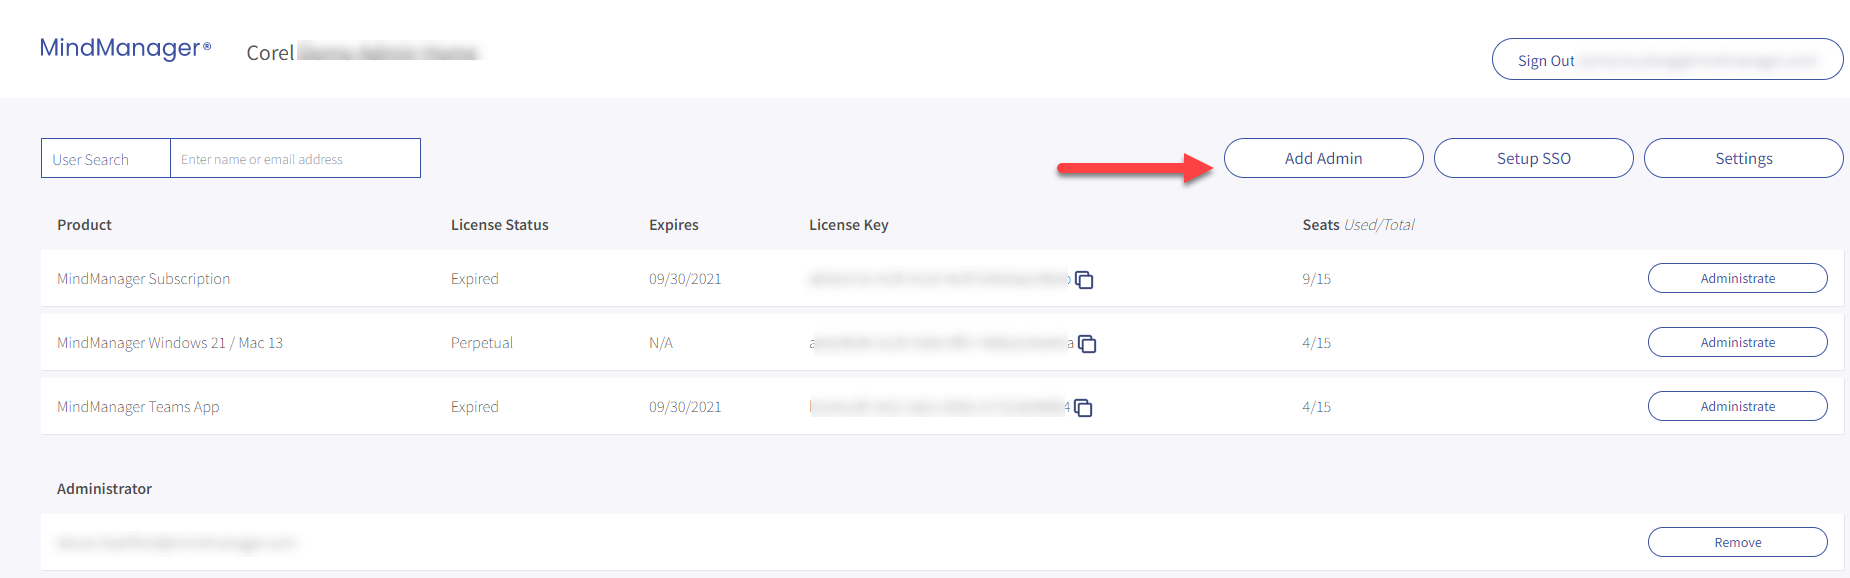
Add additional administrators
To add an admin, click on Add Admin then enter the email of the additional administrator.
You can repeat this for each administrator you want to add.
The person you entered here will receive an invitation email. He will be marked as "pending" until he has created an account and logged in as an administrator using the link in the invitation email.
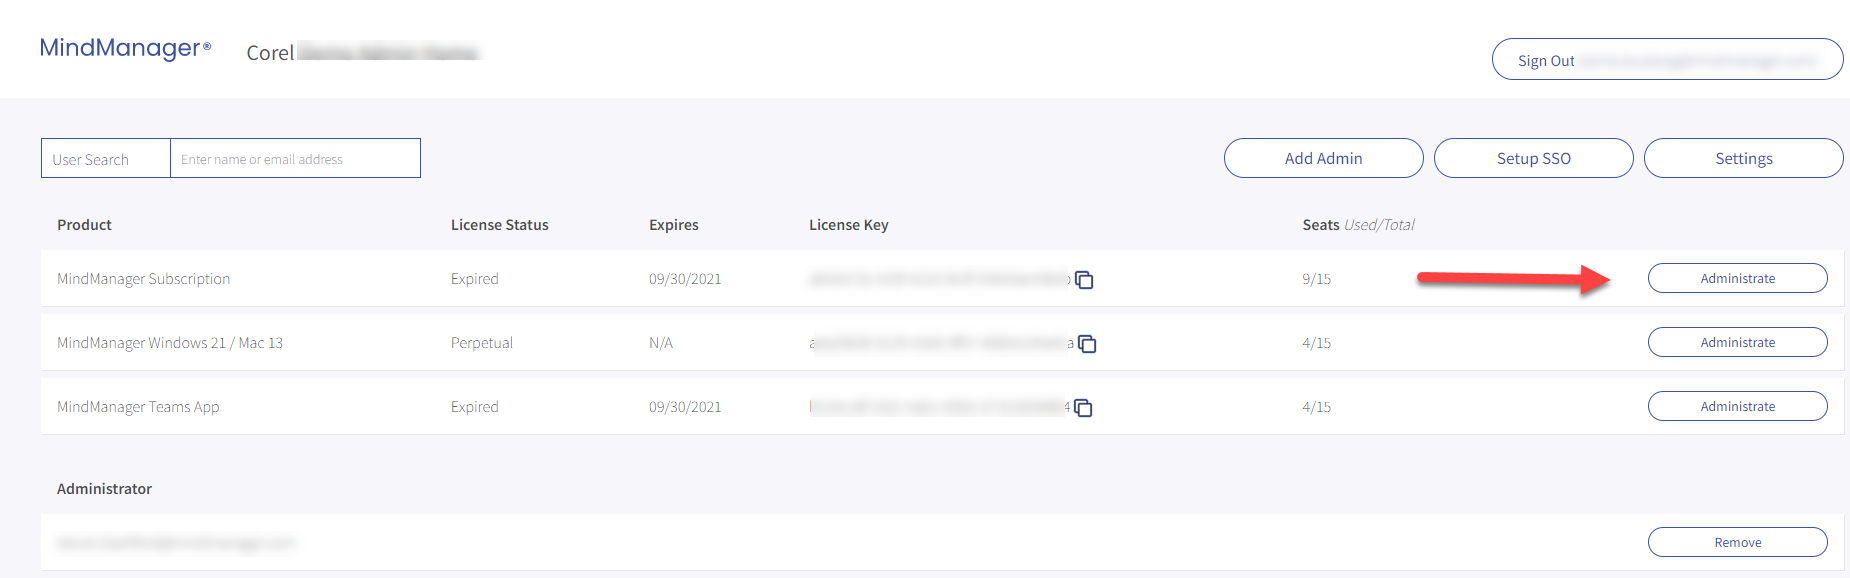
Administrate your licenses
You can also manage your licenses through the License Administration Portal.
To manage a license, select the license you want to administrate and click on Administrate on the right-hand side.
Note for customers who have a MindManager Enterprise perpetual license agreement with "MindManager Software Assurance (MSA)":
Please note the following in the license portal:
Due to your MindManager Software Assurance (MSA), you will always receive the latest MindManager versions during the validity of your MSA contract.
Each MindManager version from MindManager 21 and higher will be shown in the license portal with the number of licenses purchased up to that point.
For this reason, over-licensing may occur. Please note that only the actual number of users purchased may be distributed.
You can see the actual number of licenses (Seats) in the last delivered version.
Add users
Under User you can see which users have already been assigned a license or have previously activated their MindManager with the license key, regardless of how they assign the license.
To add new users for this license, click on Add / Manage user.
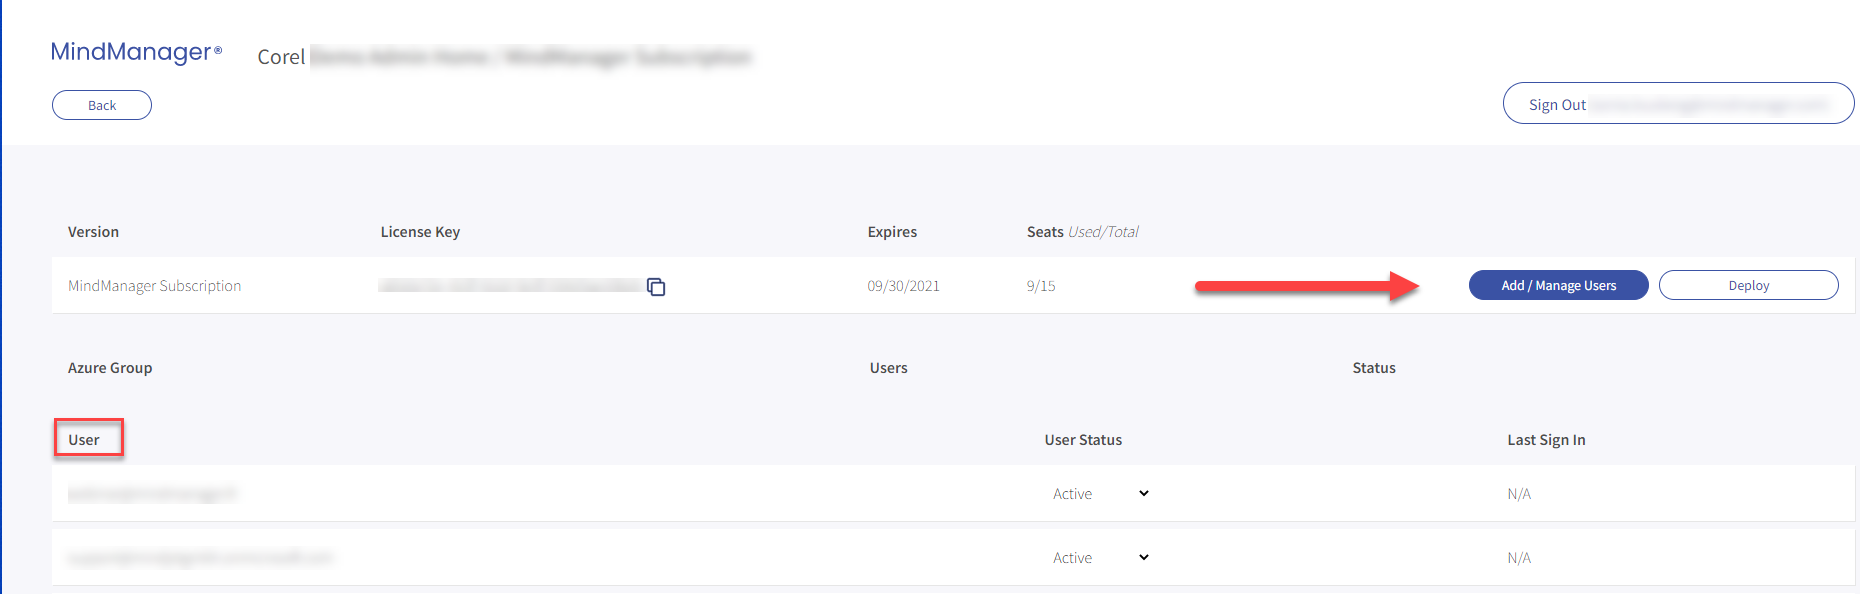
Here you can enter the user's email address or import a *.csv file. The users will receive an email that the administrator has assigned them a license.
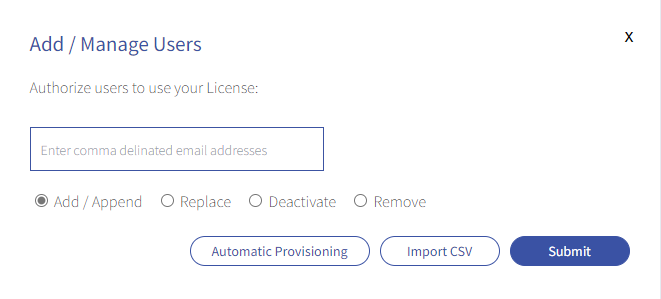
Once you have assigned a license to users, the users will be able to use MindManager as soon as they create an account or sign in, using the email address that matches the one provided in the License Administration Portal. MindManager is then immediately active for the user. The user does not need to enter the license key.
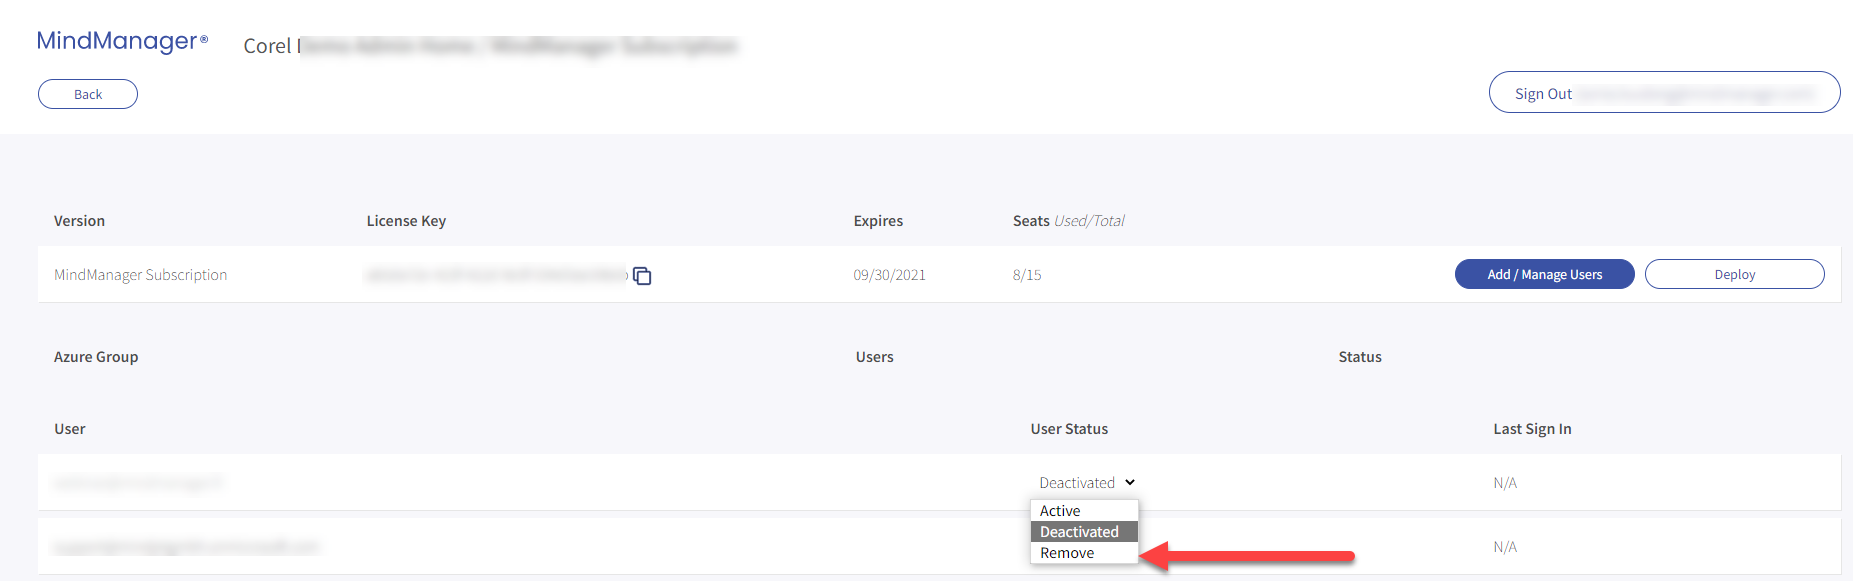
Deactivate/Remove users
If a user leaves the company, you can deactivate the account of the user by clicking on the User Status and choose deactivated.
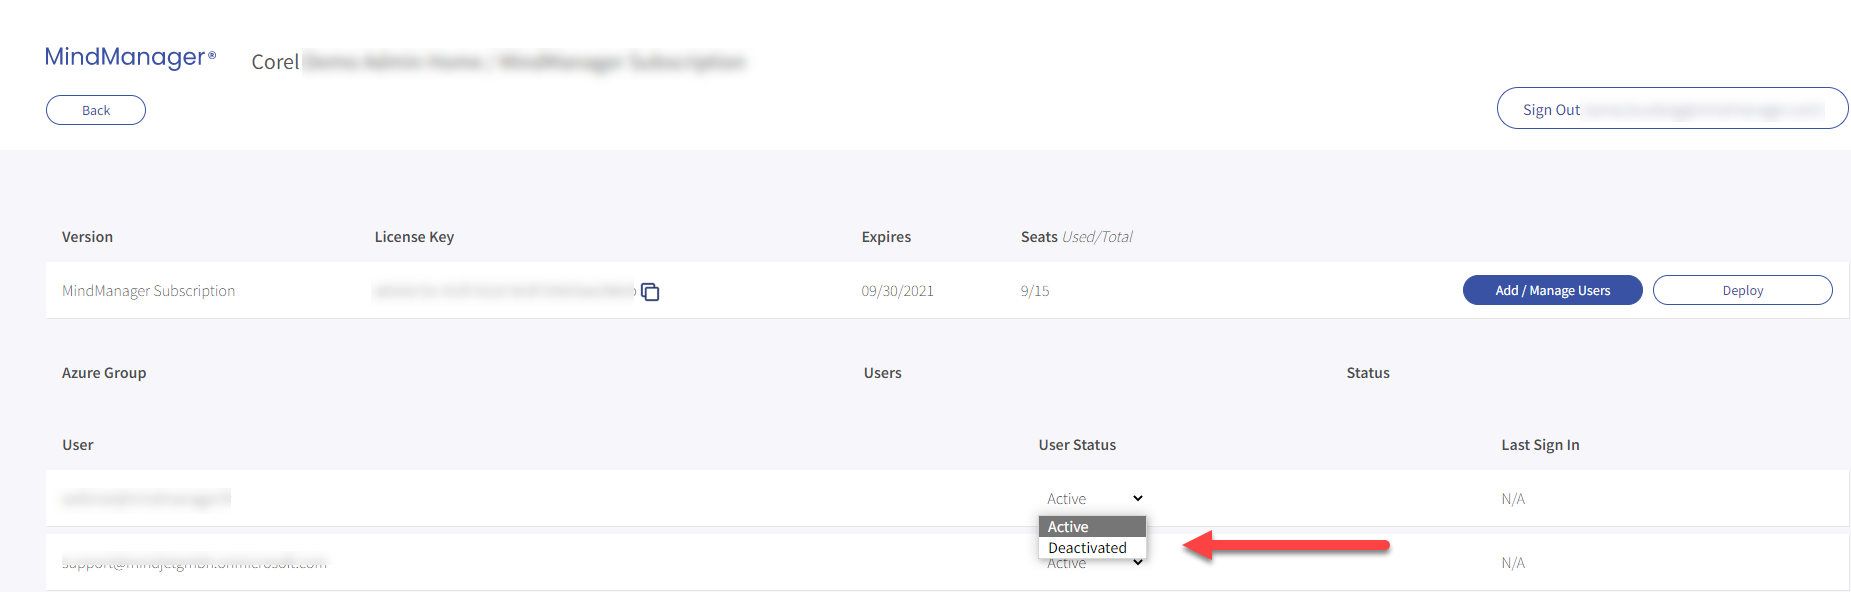
If the user now tries to login into MindManager, he will get the message “Your license was revoked or reallocated”.

When you deactivate a user, the user no longer uses the seat for the license. This allows you to reassign the license to another user. You can reactivate a user at any time.
If you want to remove a user entirely, simply select Remove from the drop-down menu.
User Search
If you manage many users, the User Search will help you find the user you want to disable or remove.
Just enter the user's email in the User search. It will show you the user. Click Details on the right-hand side, and you will see the license(s) assigned to the user, and you can deactivate any license as needed.

Downloads
Click Downloads to find the download links of the current MindManager versions.
On the download page you will also find the release notes, User guides/online help and other instructions/documentation for the respective MindManager version.
Only the download links for all our current versions for the different MindManager products are noted on the download page:
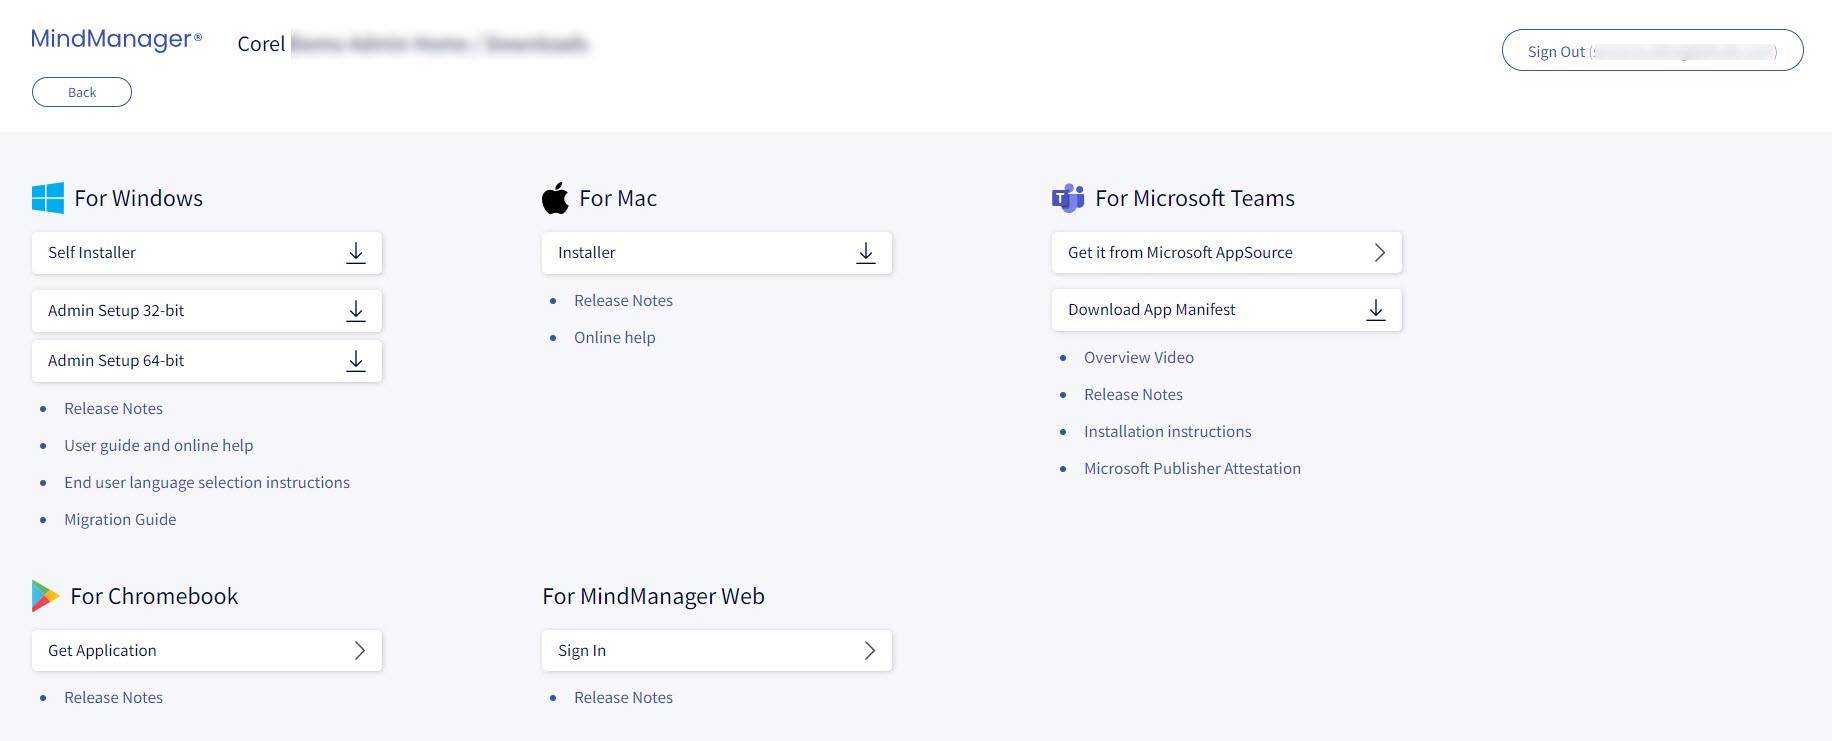
Note: You can only use the products that are included in the scope of your licence.
Settings
To find the different possible settings for all your users, click on Settings.
You have the possibility to allow or disallow certain features for all your users.
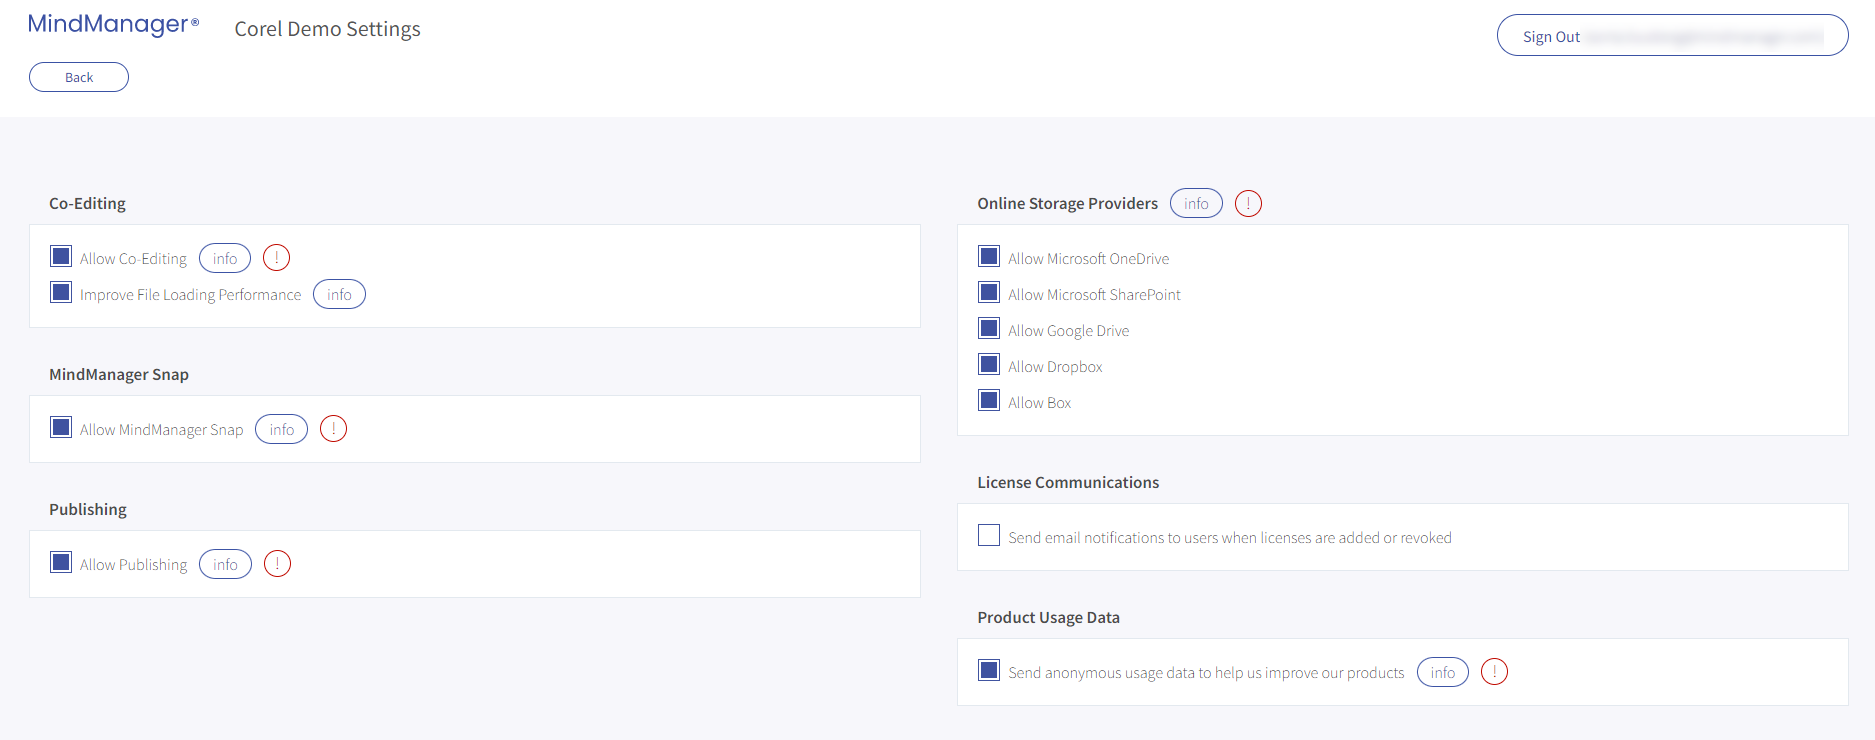
If you move the cursor over the blue Info button, you will see an explanation of the corresponding setting.
If you move the cursor over the red exclamation mark, you will see for which products the settings apply.
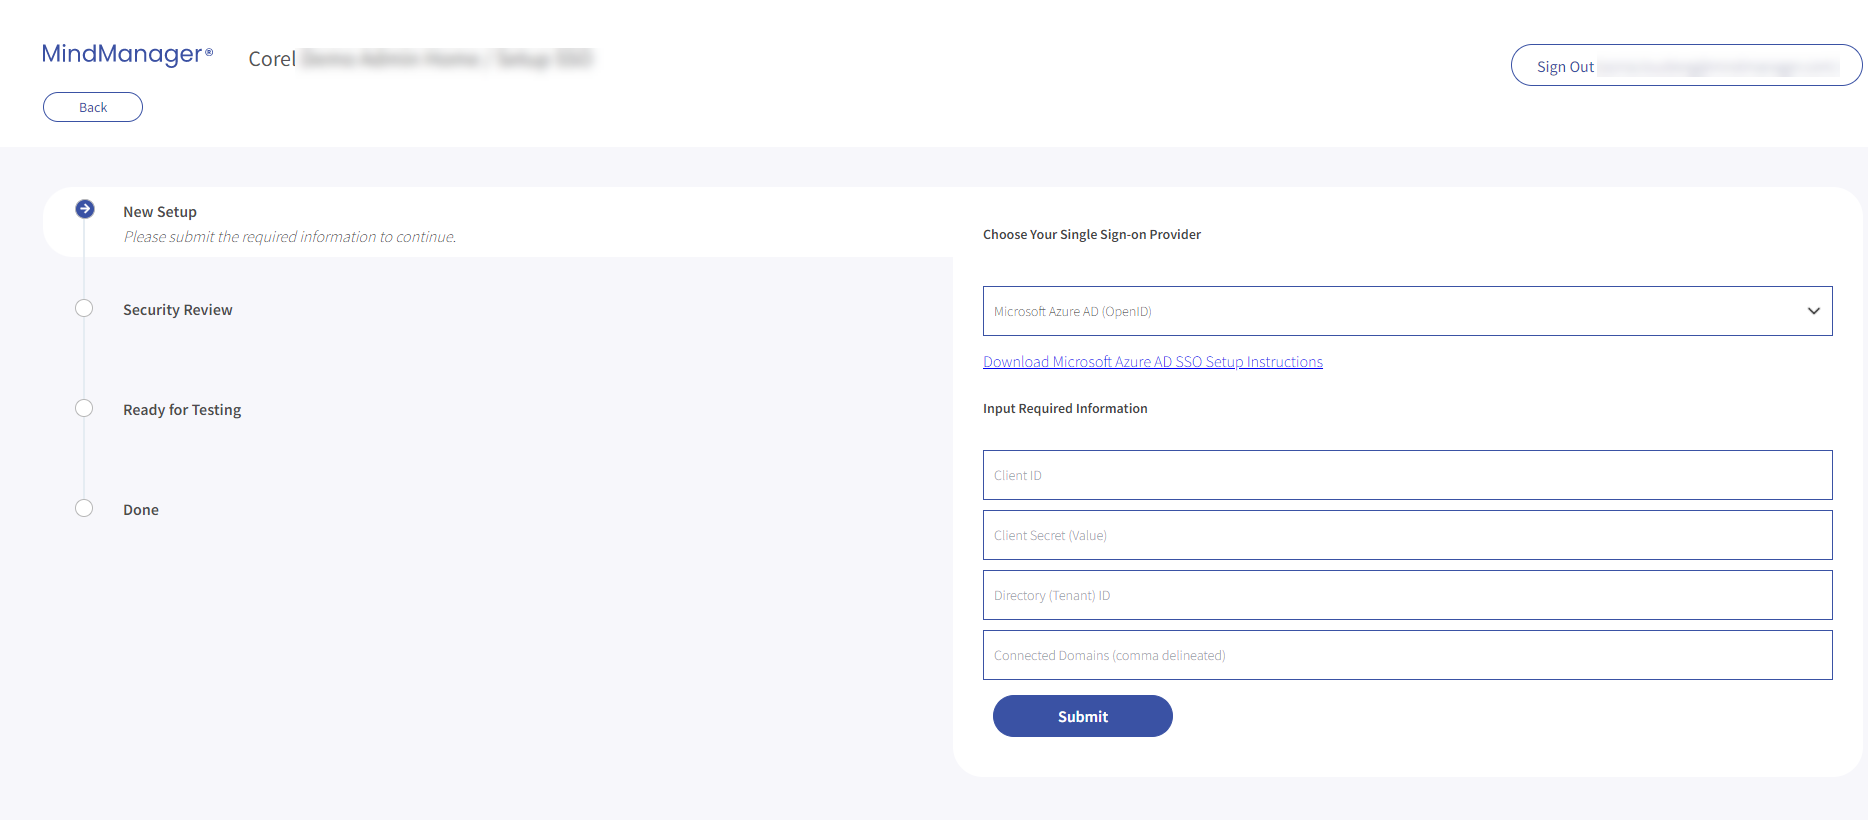
Single Sign On (SSO)
If you don't want each user to create their own MindManager account and remember a new password, you can connect your Single Sign On (SSO) provider to MindManager.
Doing this, it will allow your user to login with Single Sign On (SSO) instead of creating new MindManager account.
To set up SSO, click on Setup SSO
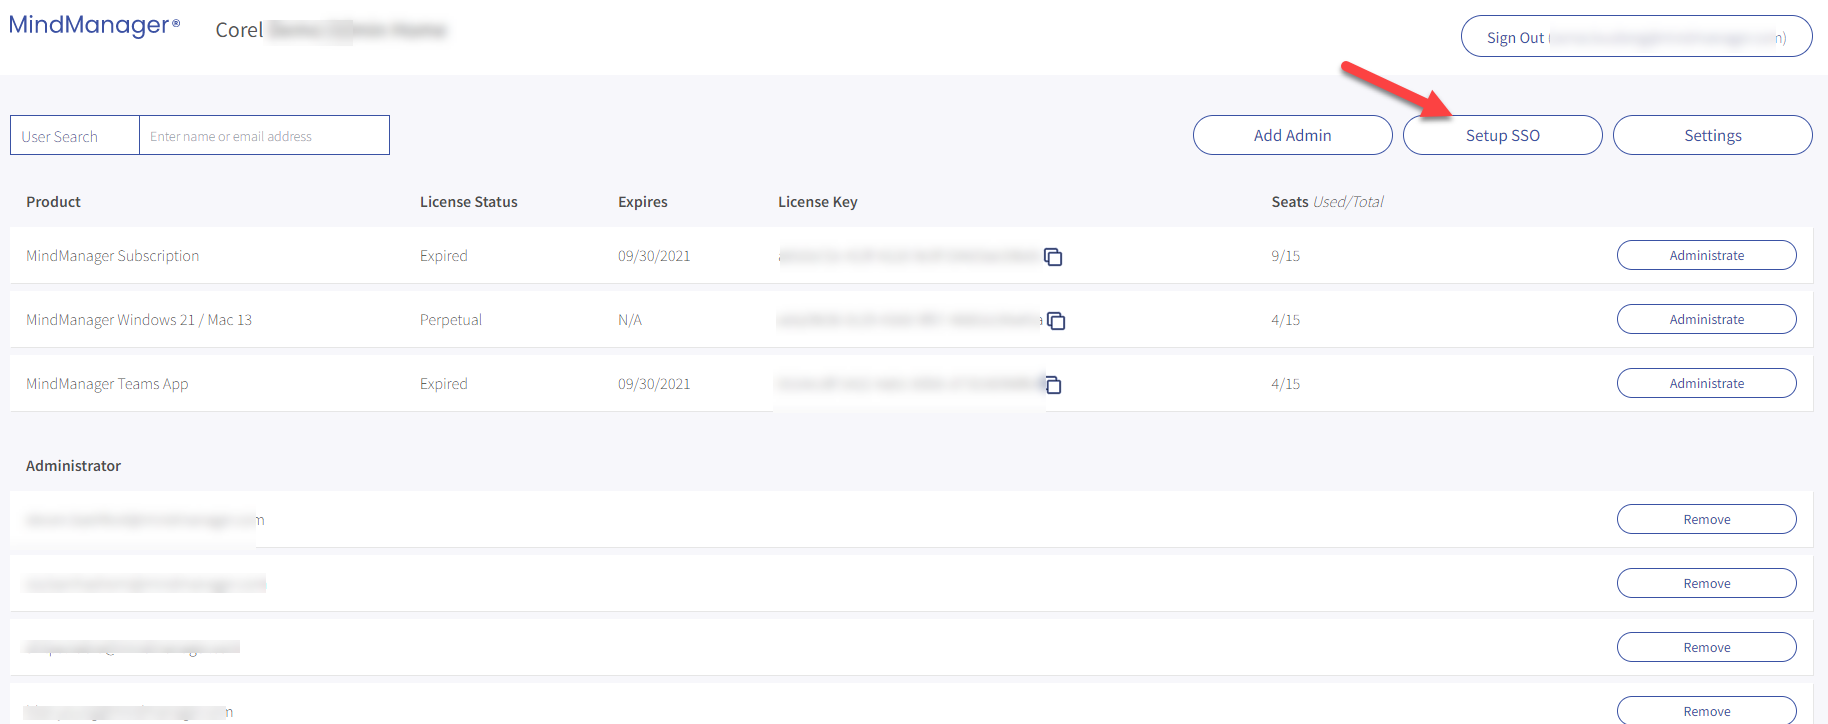
Enter all the necessary information on this page and click Submit.
For Microsoft Azure Single Sign-on (SAML and OpenID), follow the instruction in the document you can download via the following link.
For Okta Single Sign-on, follow the instruction in the document you can download via the following link.
For Google GSuite Sign-on, follow the instruction in the document you can download via the following link.
License Administration Overview Video
To understand what the new MindManager license server is and how easy it is to deploy and activate your licenses, watch this short video.
Was this article helpful?
Tell us how we can improve it.